In web design we often talk about typography, white space, and layouts but sometimes we need to make graphics. Today we’re going to discuss non-destructive editing and smoothing a selection after its been applied.
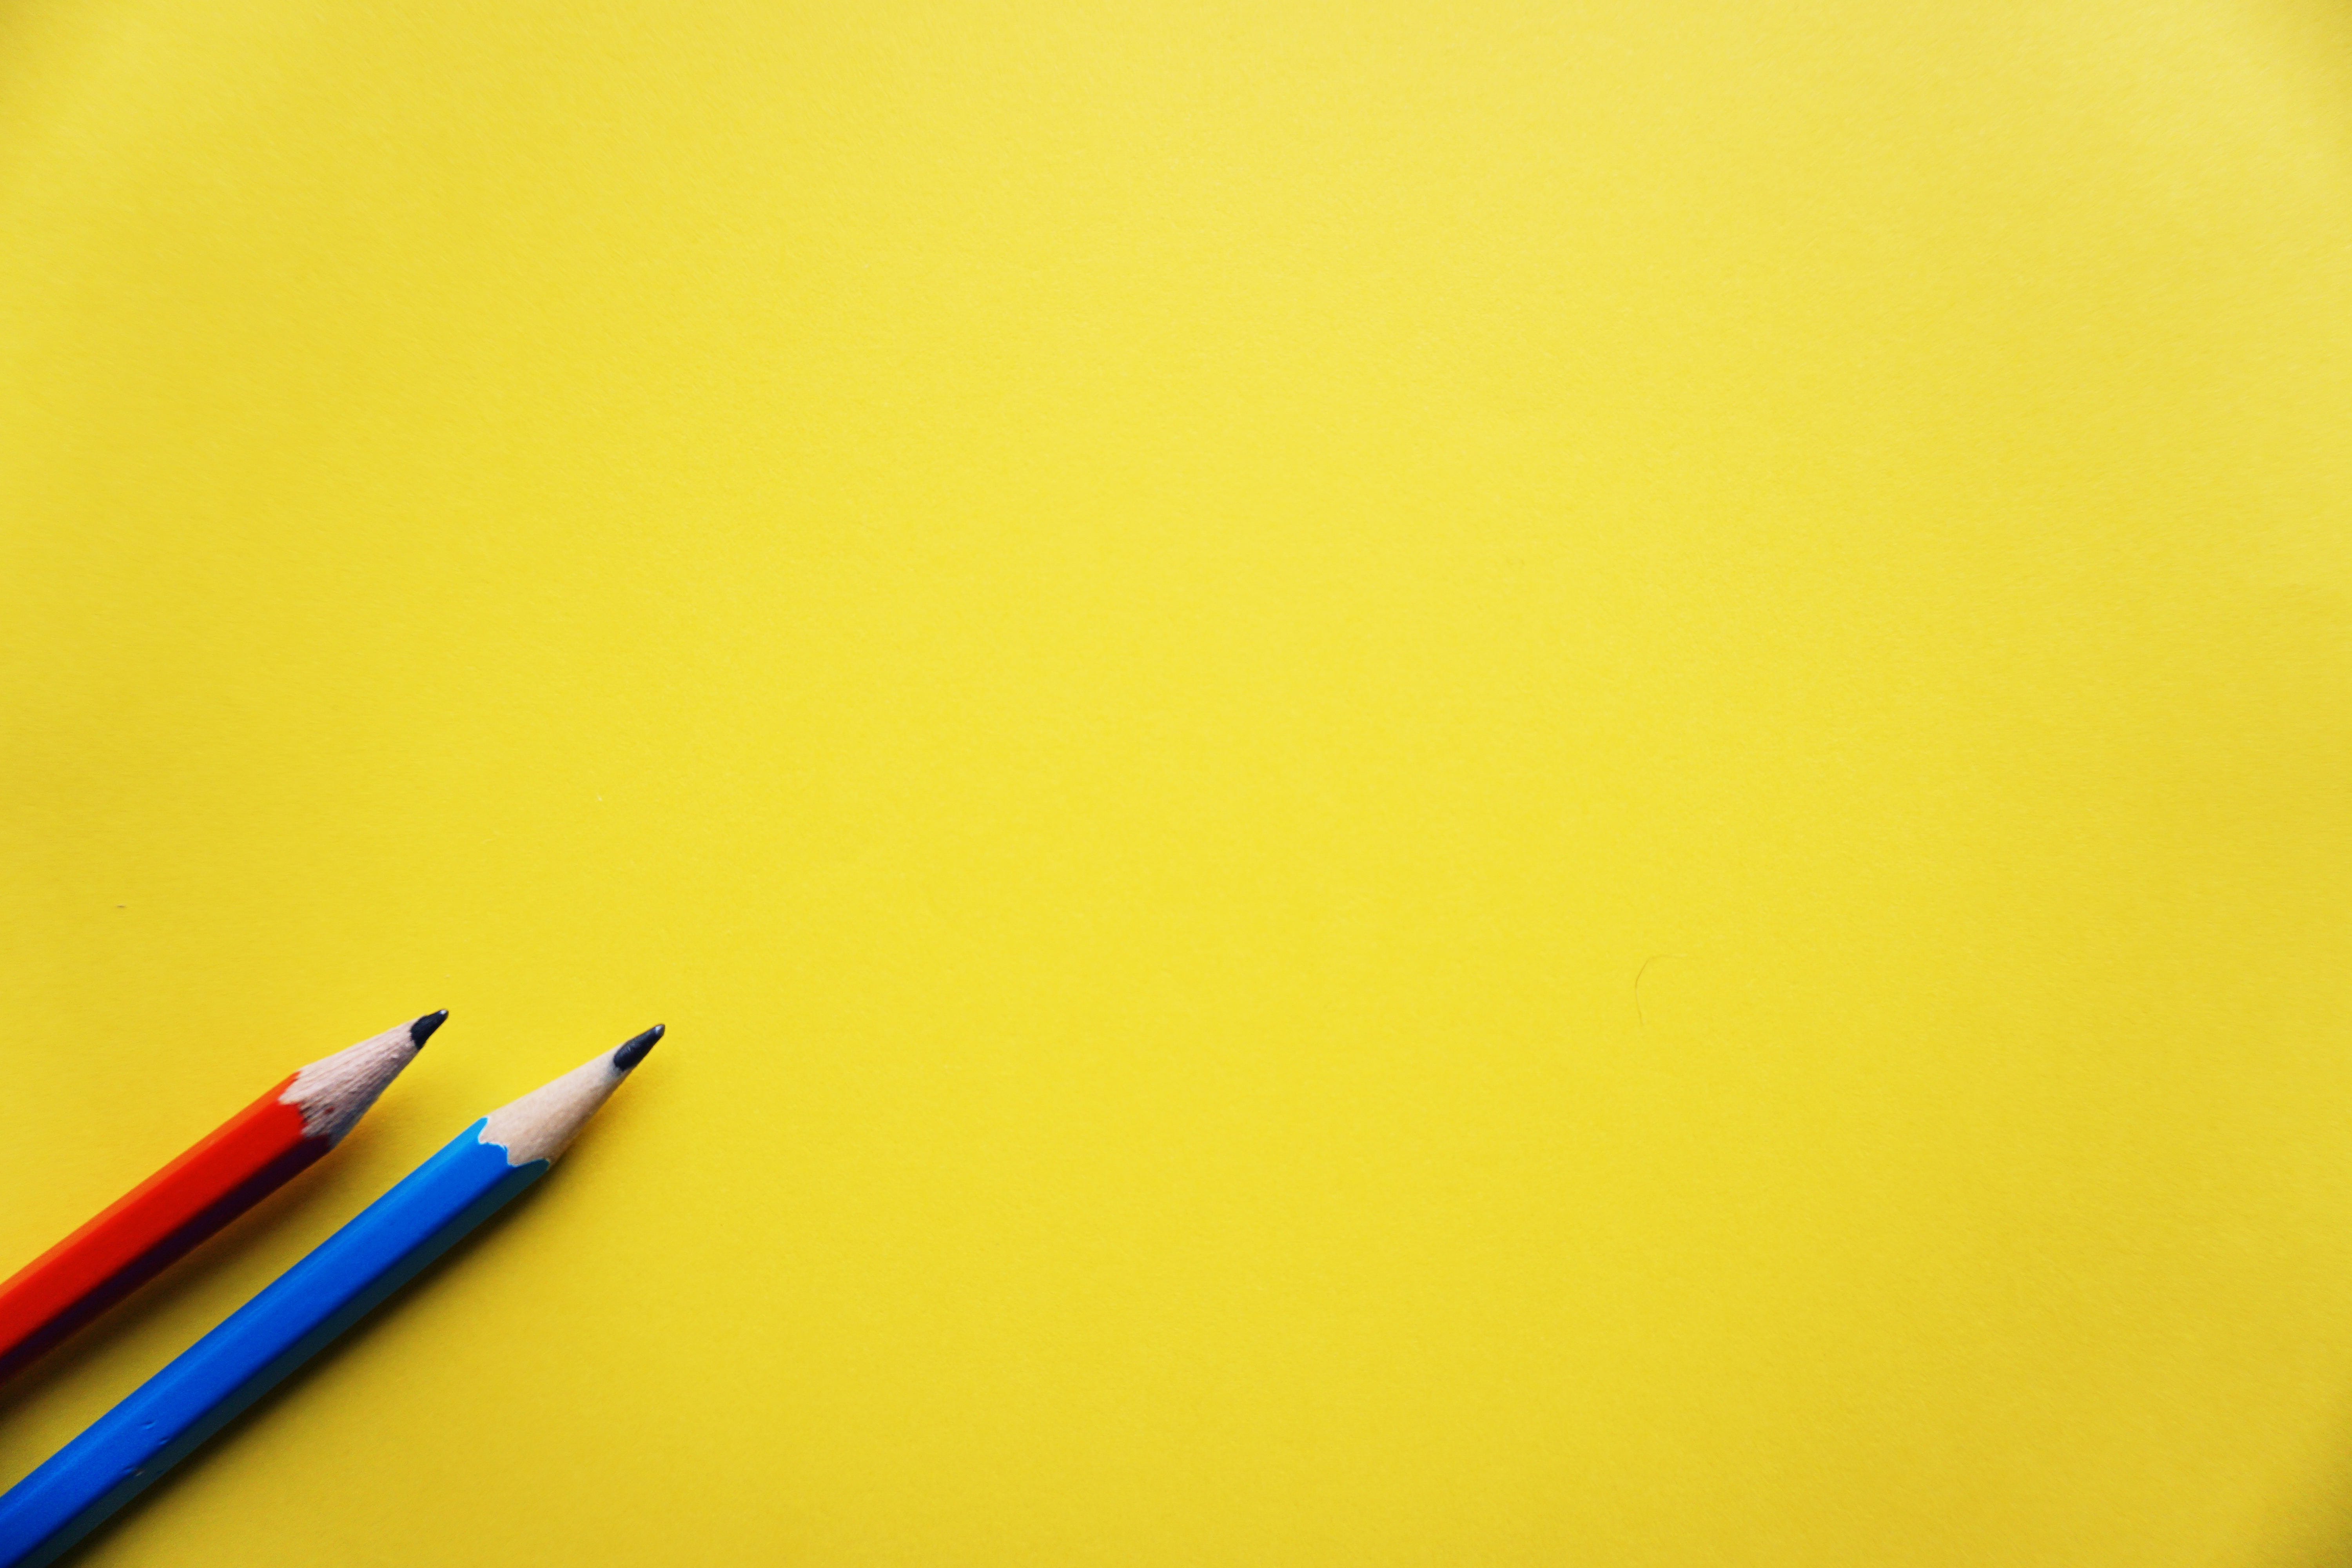
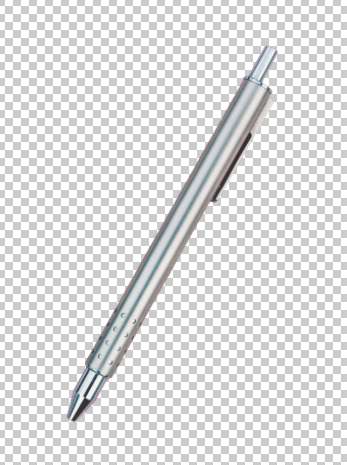
Imagine you need to make a graphic that is a collage of cutout images for a “back to school” campaign. You need images of pencils, pens, people, and notebooks. You have a high-res image of a pen you have to use but there is a background. Time to cut it out. So you grab your magic wand tool, select the background, and delete it right? You could but now you have destructively edited your image. The background is gone but you might need it back for some reason or maybe your selection was sloppy and you’ve deleted part of the pen.
Image Asset Download: https://unsplash.com/photos/S8hIymyo7ts
Layer Masks
Layer masks are used to remove parts of an image in a non-destructive manner. Instead of using the eraser tool, you apply a mask, and paint on it with a brush in black or white. Black erases and white reveals.
-
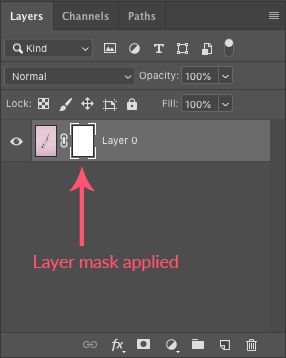
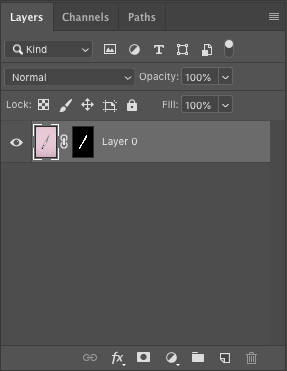
To apply a mask select your layer from the layer menu and hit the “Add Layer Mask” button (highlighted in red) at the bottom of the layers menu.
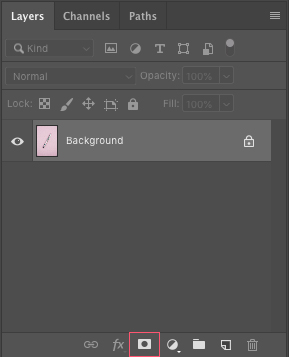
2. Your layer will now have the mask applied. This default mask type will not hide any pixels until you apply black colour to the mask.
3. Select the background of the image with the Magic Wand or Quick Selection Tool.
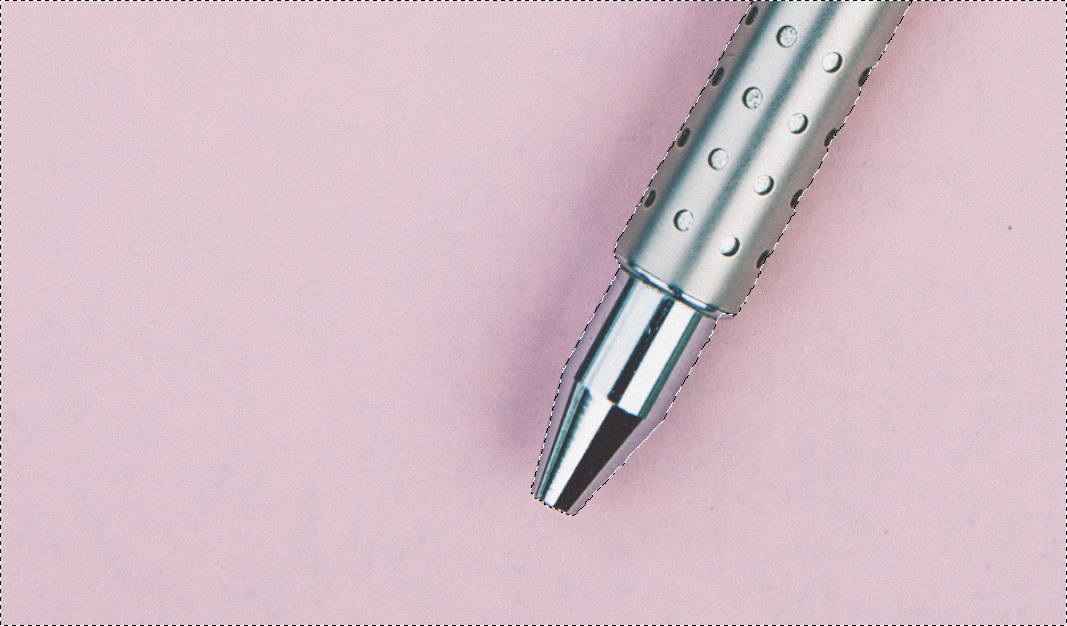
4. Click the Layer Mask on your layer and apply black paint with the Paintbrush or Paint Bucket tool to hide the background.
The pen is now isolated from the background and it looks pretty good!
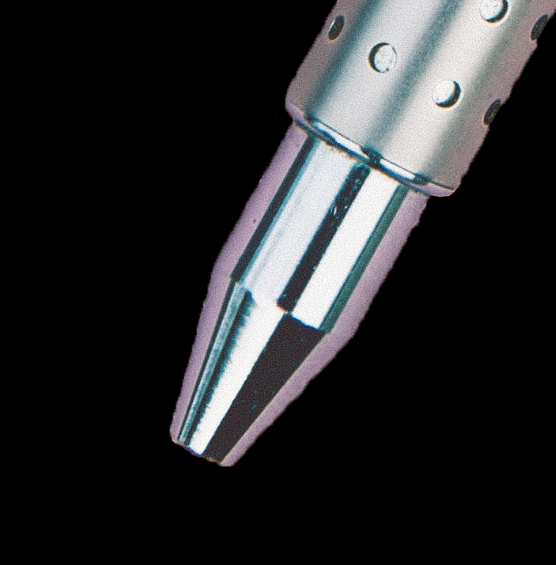
However, once you put it on a dark background you begin to notice the rough edges and it doesn’t look very clean or professional.
Magic Sliders
To solve this comes the magic sliders. Make sure your layer mask is still selected and in the Properties menu choose “Select and Mask”.

You will now see the magic sliders! You may think “oh cool, a smooth slider”. But that’s not what we’re here for. We’re going to use
-
Feather
-
Contrast
-
Shift Edge
-
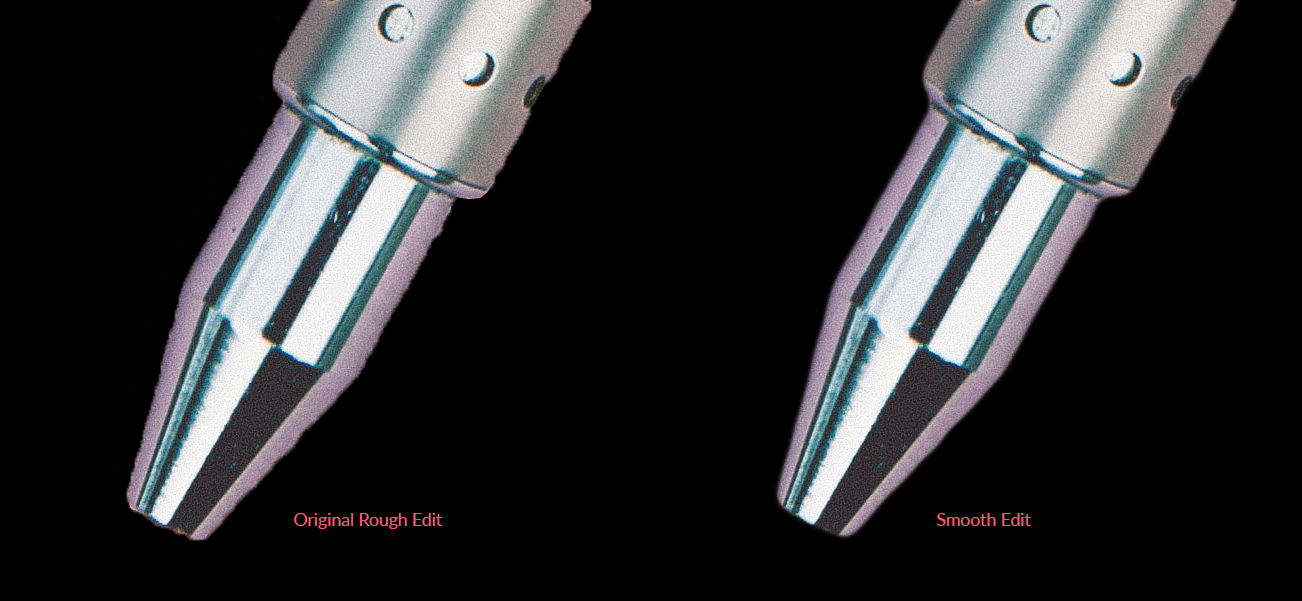
Adjust Feather till you see the edge begin to soften. For this selection I’ve stopped at 7px.
-
Adjust Contrast until you see the edge begin to sharpen. For this selection I’ve stopped at 50%.
- Now adjust “Shift Edge” to the left and you will see the mask shift further into the object smoothing out those rough edges.


Check out the before and after. The edges are now smooth and ready to be used in your design.
You now have a perfectly isolated asset that you can use on any background or in a collage. The best part is the background can always be brought back or you can adjust your selection because we did this non-destructively.
Share this Blog with colleagues